ADDING A NEW VENDOR ID FROM AN ERP SYSTEM TO A VENDOR’S PROFILE
Note: This functionality may not apply to all CapEx Manager Clients. Please consult your System Administrator to confirm availability of this feature.
1. Hover your mouse over the Administration link on the menu bar.
2. Click the Verify Vendors sub-link from the menu bar.
3. Click the Vendor’s Name link under the ‘Company Name’ column that you wish to verify from the ‘Vendors To Be Approved’ list.
4. Review the vendor’s contact information and confirm the Federal Tax ID provided.
5. Select a Service Classification Code from the list.
Note: One or more Service Classification Codes may be selected.
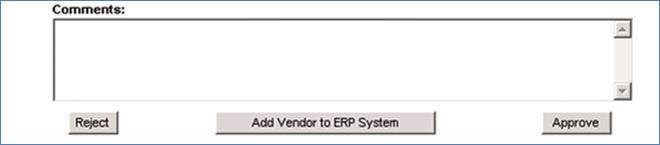
6. Click the Add Vendor to ERP System button (see Screen Shot).
Note: Clicking the Add Vendor to ERP System button adds the vendor to the ‘Vendors Pending Approval’ list on the Verify Vendor Registrations page to receive a Vendor ID from the ERP system.
7. Once a Vendor ID has been returned from the ERP system to CapEx Manager and is ready to be approved, click the checkbox to the left of the vendor’s name in the ‘Vendors Pending Approval’ page and click the Approve button.
-or-
8. Once a Vendor ID has been returned from the ERP system to CapEx Manager and needs to be rejected, click the vendor’s name in the ‘Vendors Pending Approval’ list. On the ‘Vendor Registration Approval’ page, provide comments in the provided Comments box and click the Reject button to add this vendor’s profile to the ‘Vendors Rejected’ list on the Verify Vendor Registrations page.